ct-homelab part 2: pi-hole dns on a raspberry pi 5
Greetings, fellow packet rats! Today we're adding Pi-hole to the stack: local DNS, ad blocking, and custom hostnames for every service on the network. This is part 2 of the CTLab Homelab series. Part 1 covers OS setup, Docker, and nginx.
Don't forget, these are detailed instructions on how to do this for real h4x0rZ that want to know how things work. If you want to fail at your Guru Meditation you can also just skip to the warez section and use the bootstrap to get this all running immediately.
What We're Adding
- Pi-hole - DNS server + ad blocking + local DNS records (custom hostnames)
Why Pi-hole over BIND: Pi-hole blocks ads by refusing to resolve known bad domains, forwards everything else to an upstream resolver (Cloudflare, Google), and lets you define custom local DNS records so service.ct.home resolves to your Pi's IP. BIND is overkill for a home network. That last part -- local DNS records -- is what makes the rest of this series work. Without it, www.ct.home means nothing to any device on your network.
Fix the Port 53 Conflict
Pi-hole needs port 53. First, check if anything is already using it:
sudo ss -tulpn | grep -E ':53[^0-9]'
If that returns nothing, skip this section entirely.
If you see systemd-resolved in the output, create a drop-in override to disable its stub listener:
sudo mkdir -p /etc/systemd/resolved.conf.d
sudo tee /etc/systemd/resolved.conf.d/no-stub.conf <<EOF
[Resolve]
DNSStubListener=no
EOF
sudo systemctl restart systemd-resolved
Run the ss check again to confirm port 53 is clear before proceeding. If something other than systemd-resolved is on 53 (e.g. dnsmasq, bind9), stop that service instead.
Add Pi-hole to docker-compose.yml
Open your docker-compose.yml:
nano ~/ct-homelab/docker-compose.yml
Also add PIHOLE_HOST to the nginx service's environment block so the proxy template substitution works:
    environment:
      - MAIN_SITE_HOST=${MAIN_SITE_HOST}
      - PIHOLE_HOST=${PIHOLE_HOST}
Then add the pihole service block after the nginx service:
  pihole:
    image: pihole/pihole:latest
    container_name: pihole
    restart: unless-stopped
    ports:
      - "53:53/tcp"
      - "53:53/udp"
    volumes:
      - ./pihole/etc-pihole:/etc/pihole
      - ./pihole/etc-dnsmasq.d:/etc/dnsmasq.d
    environment:
      - TZ=${TZ}
      - FTLCONF_webserver_api_password=${PIHOLE_WEBPASSWORD}
      - FTLCONF_LOCAL_IPV4=${PI_IP}
      - FTLCONF_misc_etc_dnsmasq_d=true
      - FTLCONF_dns_listeningMode=ALL
    cap_add:
      - NET_ADMIN
FTLCONF_dns_listeningMode=ALL is required in Docker. Pi-hole v6 defaults to LOCAL, meaning it only answers queries from within the container itself. Docker NAT forwards external DNS requests to the container's internal IP, not localhost, so without ALL, Pi-hole silently rejects every query from outside the host.
cap_add: NET_ADMIN is required, Pi-hole needs network admin capabilities to manage DNS traffic. Don't skip it.
Note that we're only exposing port 53 (DNS). Pi-hole's web admin UI runs on port 80 inside the container, but nginx is already on port 80 on the host, so we proxy to it instead of exposing it directly. That's the nginx step below.
Add the nginx Proxy
Pi-hole's admin UI needs a hostname to reach it through nginx. Create a new template:
nano ~/ct-homelab/nginx/templates/pihole.conf.template
server {
    listen 80;
    server_name ${PIHOLE_HOST};

    location / {
        proxy_pass http://pihole:80;
        proxy_set_header Host $host;
        proxy_set_header X-Real-IP $remote_addr;
    }
}
nginx and Pi-hole are on the same Docker network, so http://pihole:80 resolves internally. The PIHOLE_HOST variable gets substituted from your .env at container startup, same pattern as the main site config from Part 1.
Update .env
Note:
.envisn't a Pi-hole or nginx config file -- Docker Compose reads it and passes the values to both containers at startup. The ct-homelab repo reads it when you rerun bootstrap to pre-populate your configuration.
Add these variables to your .env file:
nano ~/ct-homelab/.env
# Pi-hole
# your Pi's static IP
PI_IP=192.168.1.X
# admin UI password
PIHOLE_WEBPASSWORD=changeme
PIHOLE_HOST=pihole.ct.home
If you don't know your Pi's IP:
hostname -I
Use the first IP in the output. Set a real password for PIHOLE_WEBPASSWORD, the admin UI will be accessible on your local network.
Bring Up the Stack
cd ~/ct-homelab
docker compose up -d

Check that both containers are running:
docker compose ps

You should see both nginx and pihole with status Up. If Pi-hole fails to start, the most common cause is port 53 still being in use, go back and verify ss -tulpn | grep ':53' returns nothing.
Add Base Local DNS Records
This section covers the minimum records you need to get the stack working: your Pi-hole hostname and your main site. Once Pi-hole is running, you can add records for future services through the Pi-hole admin UI at Local DNS > DNS Records without touching any files. If you ever rebuild or rerun the ct-homelab bootstrap, it writes these base records automatically.
Pi-hole v6 in Docker reads custom DNS records from /etc/dnsmasq.d/, but only if you enable it. The FTLCONF_misc_etc_dnsmasq_d=true env var you added above turns this on. The volume ./pihole/etc-dnsmasq.d:/etc/dnsmasq.d is already in your compose file, so any file you drop there gets picked up on container start.
Create the file and add your hostnames as dnsmasq address= directives:
mkdir -p ~/ct-homelab/pihole/etc-dnsmasq.d
echo "address=/pihole.ct.home/192.168.1.X" >> ~/ct-homelab/pihole/etc-dnsmasq.d/01-local-dns.conf
echo "address=/conspicuoustechnologist.ct.home/192.168.1.X" >> ~/ct-homelab/pihole/etc-dnsmasq.d/01-local-dns.conf
Replace 192.168.1.X with your Pi's IP. Then restart Pi-hole to load the records:
docker restart pihole
To add records for future services, append another line and restart:
echo "address=/newservice.ct.home/192.168.1.X" >> ~/ct-homelab/pihole/etc-dnsmasq.d/01-local-dns.conf
docker restart pihole
All services point to the same Pi IP, nginx handles routing to the right container based on the hostname.
Point Your Router's DNS to the Pi
This is router-specific, the setting is usually under DHCP or DNS in your router's admin UI. Set the Primary DNS to your Pi's IP. Leave secondary blank, or set it to a public fallback (1.1.1.1) for when the Pi is down.
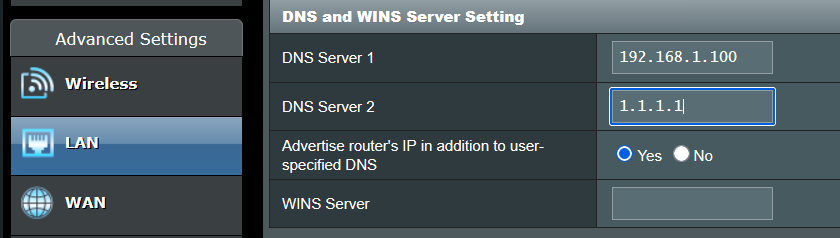
After saving, devices that renew their DHCP lease will start using Pi-hole. On most routers this happens within a few minutes. You can force it by disconnecting and reconnecting to Wi-Fi, or running ipconfig /release && ipconfig /renew on Windows.
Add Machine DNS Records
Now that your network is using Pi-hole for DNS, you can give every machine and service a hostname. Go to Local DNS > DNS Records in the Pi-hole admin UI and add an entry for each one:
| Domain | IP |
|---|---|
webserver.ct.home | 192.168.1.X |
homeautomation.ct.home | 192.168.1.X |
Enter the full hostname including the domain in the Domain field, webserver.ct.home, not just webserver. Pi-hole will save whatever you type verbatim, so if you leave off the domain it won't resolve. Hostnames must use the domain you set in your .env, DOMAIN=ct.home by default. All your service hostnames follow the same pattern: <service>.ct.home.
DNS Records vs CNAME Records: DNS Records (A records) map a hostname directly to an IP address, use these for machines and services. CNAME Records map a hostname to another hostname (an alias), useful when you want www.ct.home to point to the same place as conspicuoustechnologist.ct.home without duplicating the IP. If the IP changes, you update the A record and the CNAME follows automatically.
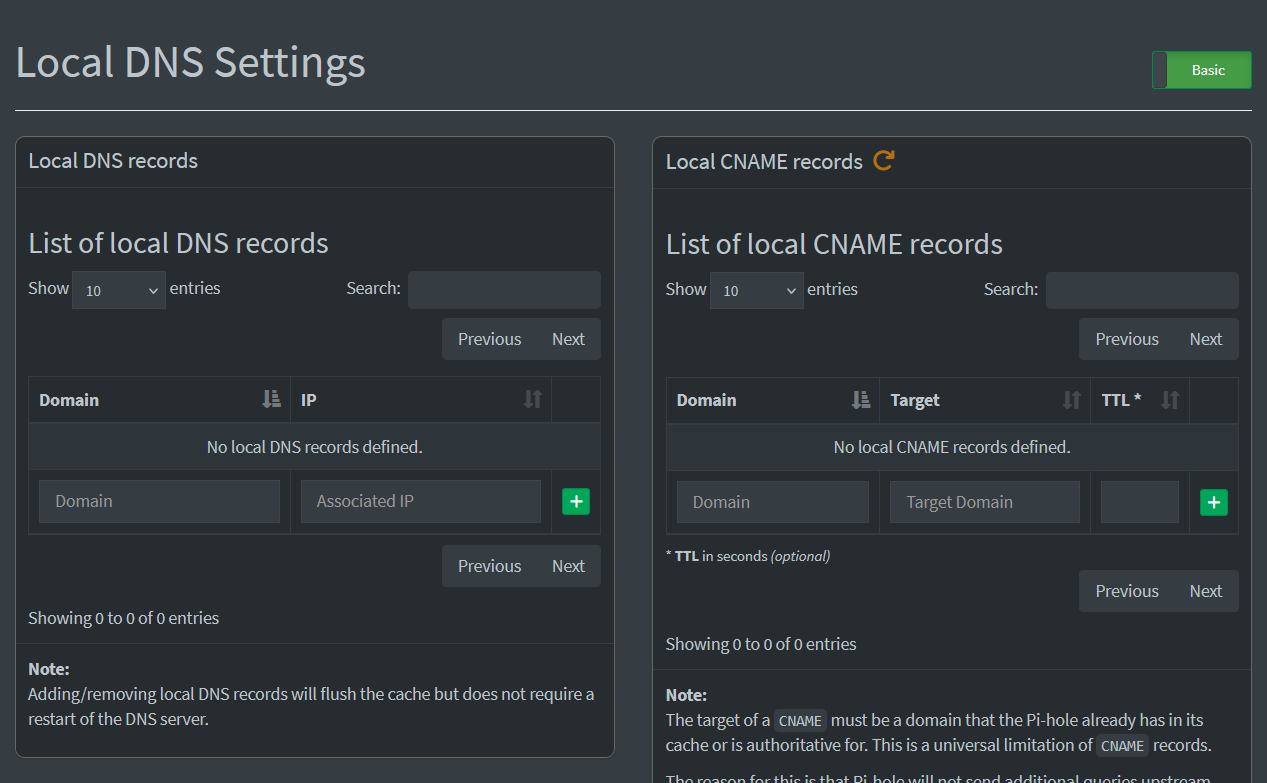
These records live in Pi-hole's database and persist across restarts and rebuilds. To back them up, use the built-in Teleporter (Settings > Teleporter in the admin UI), it exports all your DNS records, blocklists, and settings as a zip file. Save that somewhere safe.
To automate backups, the ct-homelab repo includes backup.sh, it authenticates to the Pi-hole API and downloads the Teleporter zip to ./backups/ (configurable via BACKUP_DIR), keeping the last 5 by default:
bash ~/ct-homelab/backup.sh
To restore on a rebuild, run restore_pihole.sh after bootstrap completes. It will prompt for the backup path and your Pi-hole password interactively:
bash ~/ct-homelab/restore_pihole.sh
Or run restore_all.sh to restore Pi-hole and Claude config in one shot.
Configure Upstream DNS
Pi-hole needs an upstream resolver for everything it doesn't block, queries go Pi-hole first, then upstream for anything that isn't on a blocklist.
Open a browser and go to http://pihole.ct.home/admin/. Log in with the password you set in PIHOLE_WEBPASSWORD.
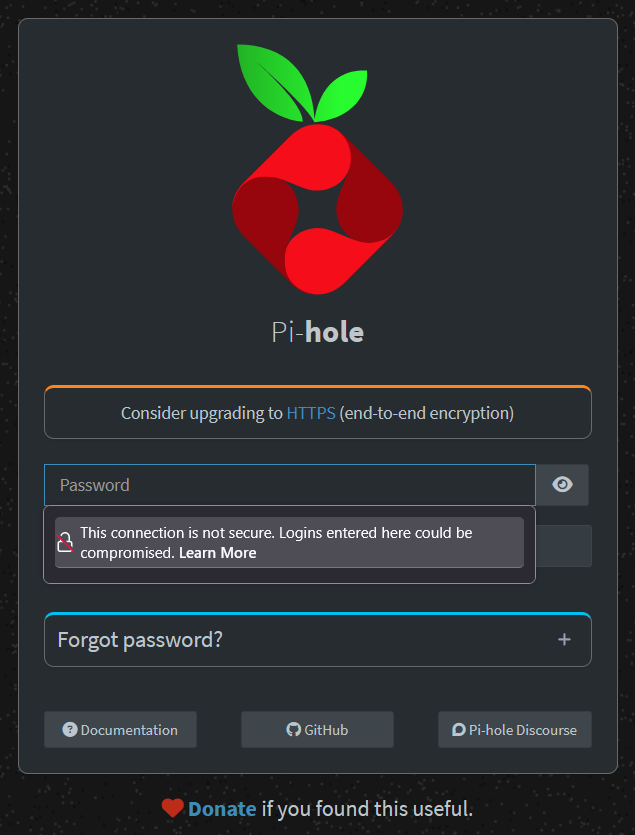
Go to Settings > DNS.
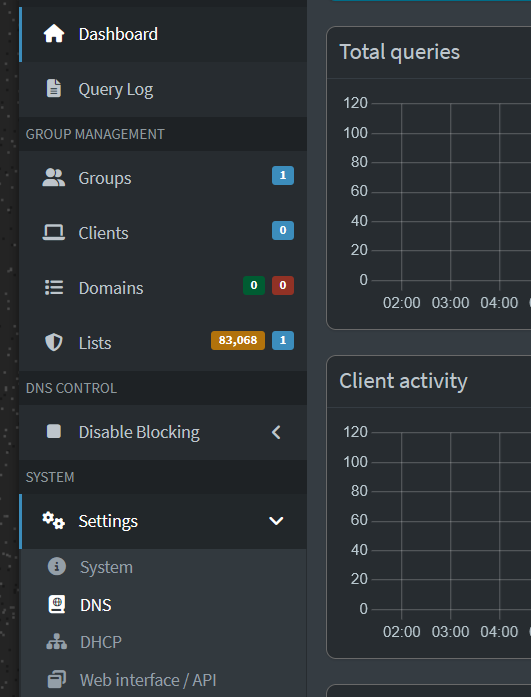
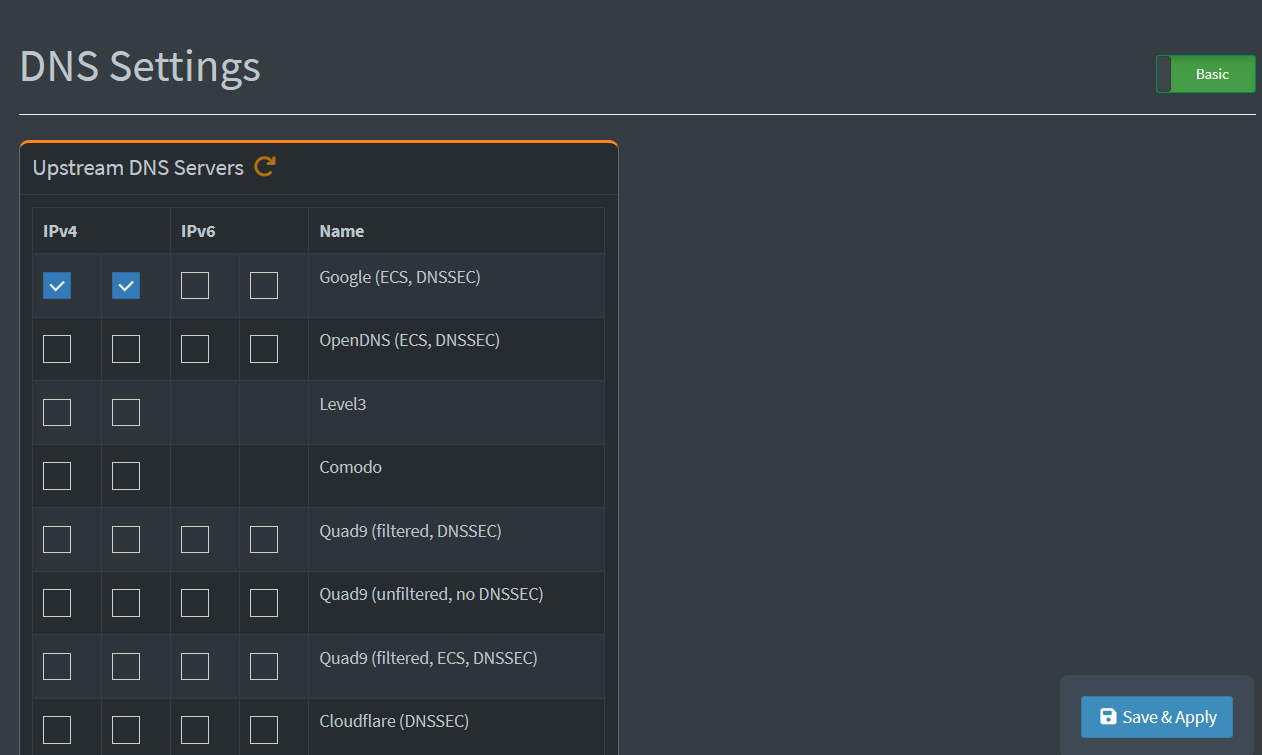
Under Upstream DNS Servers, pick whatever you want. Common choices:
- Google (ECS, DNSSEC) - reliable, supports DNSSEC
- Cloudflare (DNSSEC) - fast, privacy-focused
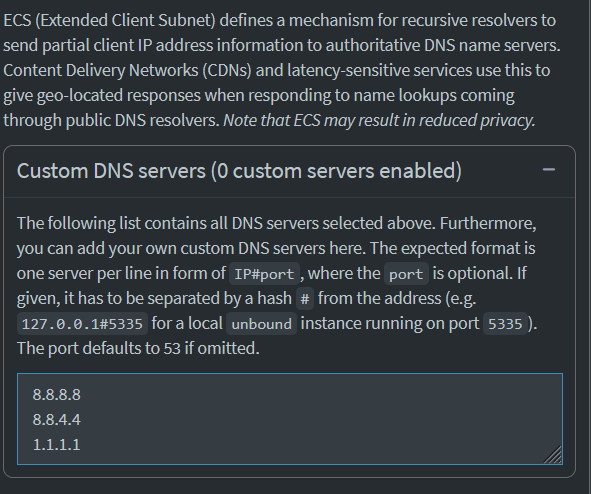
If you prefer to add your own upstream servers instead (or in addition), expand Custom DNS servers and enter them one per line in IP#port format, the port is optional and defaults to 53. For example, a local unbound instance on port 5335 would be 127.0.0.1#5335.
Click Save & Apply.
Test it. The End (of ads).
Open a new terminal on a device that's not the Pi, this proves DNS is actually resolving through Pi-hole, not a cached result on the Pi itself.
Check that your custom hostname resolves:
nslookup conspicuoustechnologist.ct.home
Should return your Pi's IP. If it doesn't, your device may still have the old DNS cached, disconnect and reconnect from Wi-Fi and try again.
Check that ad blocking is working:
nslookup doubleclick.net
Should return 0.0.0.0 or NXDOMAIN. That's Pi-hole blocking it.
Finally, open a browser and navigate to http://conspicuoustechnologist.ct.home (use your own hostname), your site should load. And http://pihole.ct.home/admin/ should take you to the Pi-hole dashboard.
If the hostnames work, DNS is running. You're done with Part 2.
Welcome to an Internet without ads.1
1. Chrome bypasses Pi-hole. Chrome's "Use secure DNS" (Settings > Privacy and security > Security) sends DNS queries directly to a DoH provider, skipping your router DNS entirely. Disable it, or switch to Firefox, which respects system DNS by default. ↩︎
2. More blocklists. Pi-hole ships with one default list. hagezi/dns-blocklists maintains a well-curated collection ranging from light to aggressive. Add them under Lists in the admin UI. The "Multi Normal" list is a good starting point. oisd.nl is another popular single-list option that covers ads, trackers, malware, and phishing in one well-maintained feed.