ct-homelab part 4: sharing folders with samba
Greetings, fellow network hoarders. Today we're setting up Samba on the pi - SMB shares accessible from Windows, Mac, and Linux without installing anything on the client side. Your pi becomes a NAS. This is part 4 of the CTLab Homelab series.
These detailed instructions are for the sysadmins that want to know what's actually happening on the wire. If you're a lamer and just want the files, head to warez and let the bootstrap handle it.
Why Samba
SMB is the native file-sharing protocol on Windows, and macOS and Linux support it natively too. No client software, no VPN required (on the local network), just map a drive and go. Samba is the open-source implementation that runs on Linux/pi.
Prerequisites: part 1 (pi OS + Docker baseline), part 2 (Pi-hole DNS), part 3 (Claude Code on pi).
Install Samba
sudo apt update && sudo apt install -y samba samba-common-bin
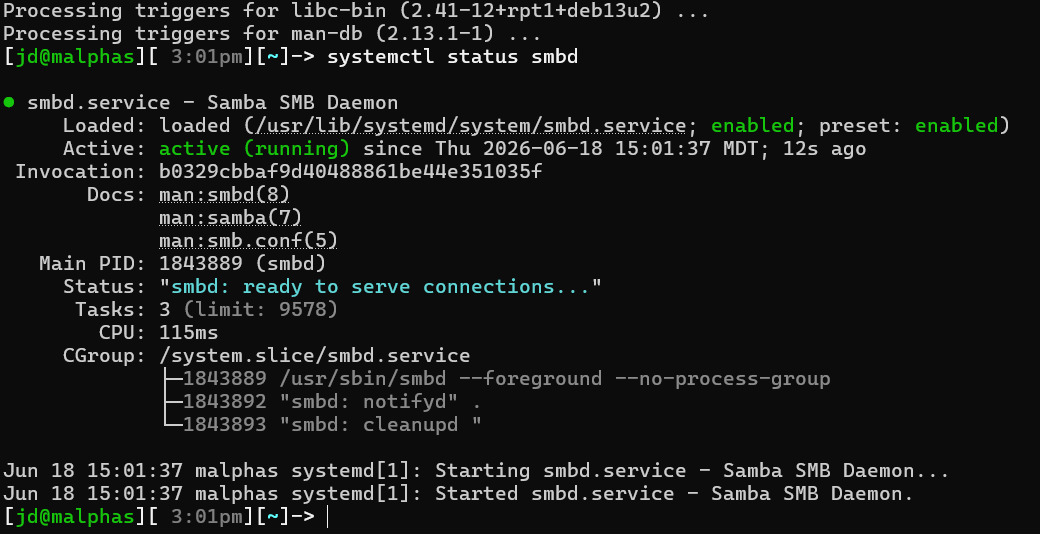
Verify it installed and the service came up:
systemctl status smbd
Create and Configure the Share
mkdir -p /home/jd/transfer
Replace jd with your actual username. This will be your shared drop folder, accessible from any machine on the network.
Configure /etc/samba/smb.conf
Back up the default config first:
sudo cp /etc/samba/smb.conf /etc/samba/smb.conf.bak
Append your share definition to the bottom of /etc/samba/smb.conf:
sudo nano /etc/samba/smb.conf
[shared]
   path = /home/jd/transfer
   browseable = yes
   read only = no
   guest ok = no
   valid users = @sambashare
   create mask = 0660
   directory mask = 0770
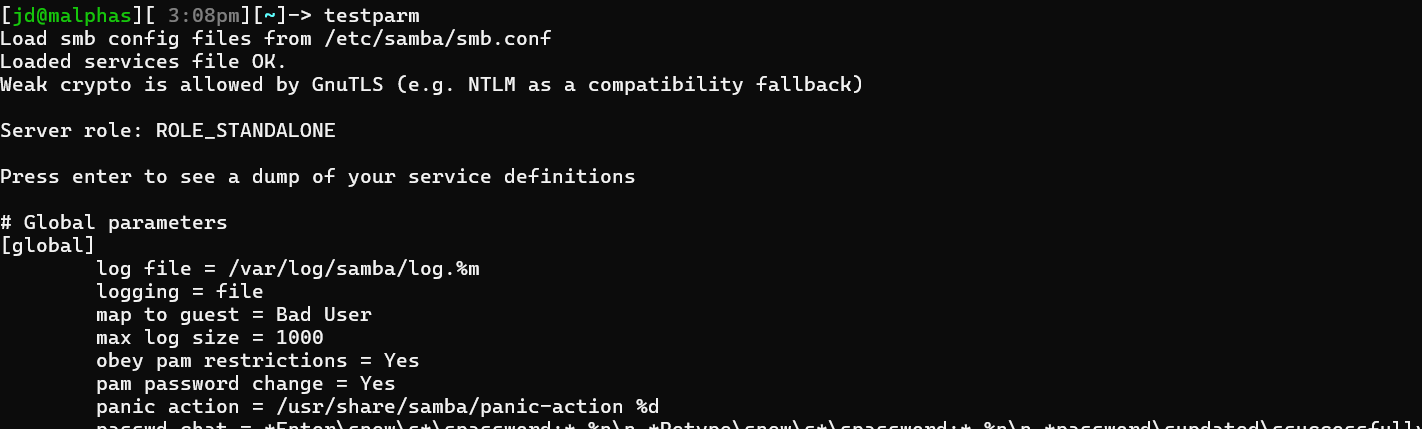
Validate the config before restarting:
testparm
Fix any errors testparm reports before moving on.
Create Samba User and Password
Samba manages its own password database separate from Linux system passwords. The user must exist as a system user first.
First, confirm the sambashare group exists (Samba creates it on some distros but not all):
getent group sambashare
If nothing is returned, create it:
sudo groupadd sambashare
Add your pi user to the sambashare group. Replace jd with your username:
sudo usermod -aG sambashare jd
Then register the user with Samba and set a password. Replace jd with your username:
sudo smbpasswd -a jd
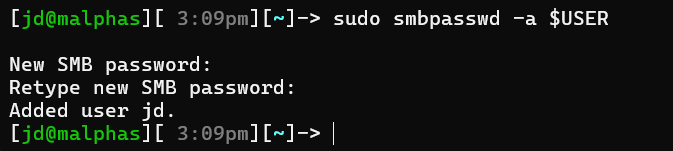
You will be prompted to enter and confirm the Samba password. This is independent of the Linux login password, though you can use the same one if you want to keep it simple. If you use a password manager like KeePass or KeePassXC, store it there.
Set Share Permissions
Replace jd with your username:
sudo chown -R jd:sambashare /home/jd/transfer
sudo chmod -R 0770 /home/jd/transfer
The sambashare group ownership is what ties the directory to the valid users = @sambashare line in smb.conf. Any user in that group can read and write.
Heads up on file permissions from Windows: When you copy a file into the share from Windows, Samba applies the create mask = 0660 from your config. That means the file ends up as rw-rw---- - readable and writable by the owner and group, but not by anyone else (including web servers). If you are using the share to stage files for a web server or other service that runs as its own user, those files will be unreadable and you will get 403 errors. Fix it by running chmod 644 on the files after copying them, or adjust create mask = 0664 in smb.conf if you want world-readable files by default. If you have a deploy script that rsyncs files to a web server, add a chmod pass after the rsync so permissions are corrected automatically on every deploy - otherwise you will be chasing 403s every time you stage a file through the share.
Restart Samba Service
sudo systemctl restart smbd nmbd
sudo systemctl enable smbd nmbd
smbd handles file sharing. nmbd handles NetBIOS name resolution, which is what lets Windows find the share by hostname rather than IP. Enable both so they survive a reboot.
Confirm both are running:
systemctl status smbd nmbd

Add Pi-hole DNS Record
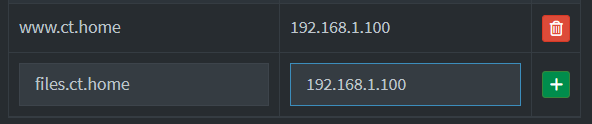
If you set up Pi-hole in part 2, add a DNS record so your share is reachable by hostname instead of IP address. Open the Pi-hole admin UI at http://pihole.ct.home/admin/, go to System > Settings > Local DNS Settings, and add:
| Domain | IP |
|---|---|
files.ct.home | 192.168.1.X |
Replace 192.168.1.X with your pi's IP (hostname -I on the pi if you need it), and replace files.ct.home with whatever hostname you want to use. Once saved, you can browse to \\files.ct.home\shared from Windows instead of using the IP or NetBIOS name.
If you skipped Pi-hole, use your pi's IP address directly everywhere this guide shows a hostname.
Browse the Share
You can access the share without mapping a drive. Use your pi's hostname or IP address and the share name shared.
Windows - paste into File Explorer's address bar:
\\malphas\shared
macOS - Finder > Go > Connect to Server:
smb://malphas/shared
Linux - file manager address bar:
smb://malphas/shared
Or via terminal:
smbclient //malphas/shared -U jd
Replace malphas with your pi's hostname or IP address, and jd with your Samba username.
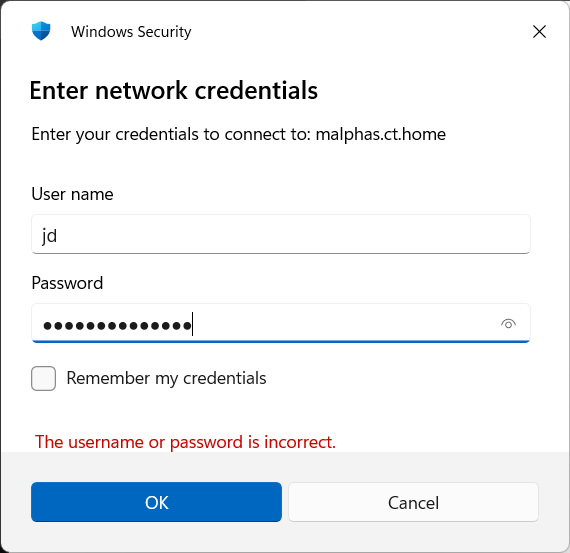
Windows will prompt for credentials the first time. Use the Samba username and password you set with smbpasswd.
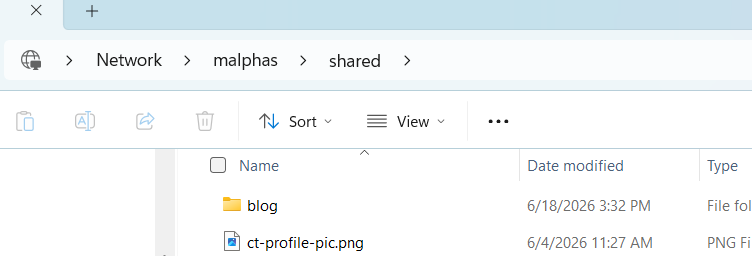
Once authenticated, the share shows up in File Explorer.
Map a Drive
For persistent access, map the share as a drive so it shows up automatically on every login.
Windows
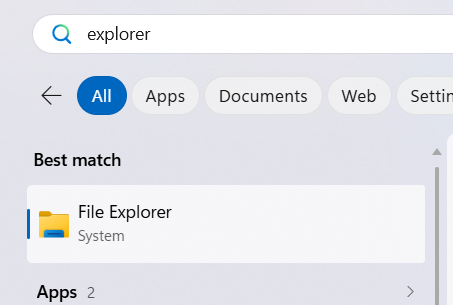
- Press the Windows key, type
explorer, and press Enter to open File Explorer.
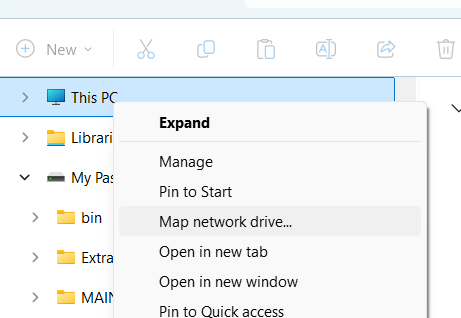
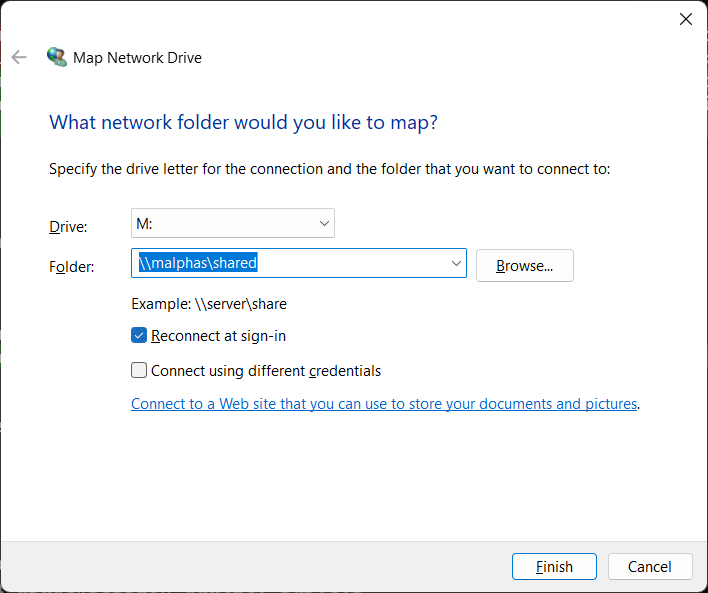
- In the left sidebar, right-click This PC and select Map network drive.
- Choose a drive letter from the Drive dropdown (e.g.
Z:). - In the Folder field, type:
\\malphas\shared- replacemalphaswith your pi's hostname or IP address. - Check Reconnect at sign-in.
- Click Finish.
- A credentials prompt will appear. Enter your Samba username (
jd- replace with yours) and the password you set withsmbpasswd. Click OK.
The drive will appear under This PC in File Explorer and reconnect automatically each time you log in.
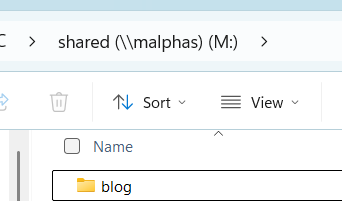
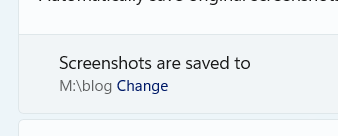
Once mapped, you can point Windows apps directly at the share. For example, open the Snipping Tool, click the gear icon to open Settings, and set the save location to your mapped drive - screenshots go straight to the pi.
Note: If Windows cached bad credentials from a previous failed attempt and keeps rejecting you, clear them first. Press the Windows key, type
Credential Manager, and press Enter. Click Windows Credentials, find any entry formalphas(or your pi's hostname), click it, and select Remove. Then try mapping the drive again.
macOS
Finder > Go > Connect to Server (or Cmd+K), enter smb://malphas/shared - replace malphas with your pi's hostname or IP address - click Connect, enter credentials. To auto-mount on login, open System Settings > General > Login Items, click +, and add the mounted share from your desktop.
Linux
Create a mount point and mount the share:
sudo mkdir -p /mnt/shared
sudo mount -t cifs //malphas/shared /mnt/shared -o username=jd
# replace malphas with your pi's hostname or IP, and jd with your Samba username
For a persistent mount that survives reboots, store credentials in a protected file first:
sudo nano /etc/samba/credentials
username=jd
password=yourpassword
sudo chmod 600 /etc/samba/credentials
Then add to /etc/fstab:
//malphas/shared /mnt/shared cifs credentials=/etc/samba/credentials,uid=1000,gid=1000,iocharset=utf8 0 0
Replace uid=1000,gid=1000 with the output of id -u and id -g for your user.
WAREZ.LOCAL
No ratio. No leech detection. No "this FTP is members-only, ask the sysop for access." Your LAN just got its own little slice of the scene, and the only release group is you. Drop a file from any machine, grab it from any other machine, never email yourself a PDF again as long as you live. Every screenshot in this post landed straight on the share the second I took it - Snipping Tool saves to M:\blog now, no USB stick, no texting myself a picture and re-downloading it like an animal. The pi that started as a dumb little webserver back in part 1 just became your own private drop site. Mission creep, but the good kind.
If you ever wipe the SD card and start fresh, restore_all.sh from the ct-homelab repo now restores Samba too, right alongside Pi-hole and Claude Code. It just re-runs samba/setup.sh and reminds you to reset your password, since smbpasswd doesn't survive a backup/restore round trip. One less thing to remember at 2:37am when you're rebuilding because you fat-fingered an rm -rf.
Next up: Nginx Proxy Manager, because a friend looked at my repo and filed an issue about it. Building in public works.